
This post may contain affiliate links
No matter what point in your guitar-playing career you are in, picking up new effect pedals is always an exciting time. Perhaps this is because pedals can significantly help you achieve those perfect guitar tones you have been dreaming of, without completely breaking the bank. There comes a time in a guitar player’s life where they will end up needing to learn how to set up a pedalboard.
However, knowing how to set up and arrange guitar pedals on a pedalboard can be a rather daunting task. Understanding: how to organize the signal chain to find the perfect sound and how to use power supplies can be intimidating enough to completely turn some guitar players away from the idea of a pedalboard. Of course, you can haul your pedals around in a backpack, but let’s be honest, that can end up causing damage to your beloved pedals and turn your cables into a tangled snake pit of horrors. If you find yourself with more than three or four pedals, it may be time to set up a pedalboard.
Have no fear! Pedal Haven is here to help. We put together a guide to building and learning how to set up a pedalboard, and we hope to alleviate some of this stress. This guide will supply you with an ideal beginner’s pedalboard setup, as well as some tips to understand the technical side of your pedalboard.
Finding Your Pedalboard
Of course, step one of organizing your pedalboard is, in fact, finding a pedalboard. Pedalboards come in all shapes and sizes, with a large number of optional add-ons as well. However, just about anything flat can suffice as a pedalboard – especially if you are just starting out. We have seen plywood, skateboard decks, and vintage suitcases being used as pedalboards – the opportunities are endless. Of course, we would recommend getting a nice started pedalboard, like a Pedaltrain, and as your board becomes more advanced, you can upgrade to a bigger pedalboard with more options to fit your needs.
Now that you have your board, it is time learn how to arrange the guitar pedals on your pedalboard to build your signal chain. Don’t worry, this is the fun part!

How To Set Up a Pedalboard – How to Arrange your Guitar Pedals
The average guitar player’s pedalboard consists of about 6 pedals. A tuner pedal, overdrive or distortion pedal, a delay pedal, a reverb pedal, a volume pedal, and some kind of modulation pedal like a pitch shifter or flanger pedal.
Organizing your pedals is one of the most important steps in the world of effect pedals. The order of your pedal chain should allow each pedal to showcase its individual tones while complimenting the other pedal(s) that are feeding into it from the input jack. The flow of your guitar’s signal through these pedals is called your “signal chain”. Of course, there is room for personal preference when organizing your pedal board’s signal chain, but here is how you can order the six most common pedals during your pedalboard setup.
1. Tuner
Your tuner pedal should almost always be the first pedal in your signal chain. This will allow your tuner to have a clear, uninterrupted signal from your guitar – allowing for a much more accurate reading of whether or not your guitar is in tune.
2. Distortion/Overdrive/Fuzz
After the tuner, you should have a dirt pedal of some sort. This can be an overdrive pedal (like an Ibanez Tube Screamer), a distortion pedal, an “Amp in a Box” style pedal, or one of your favorite fuzz pedals – depending on the style of music you are playing. In most cases, having your dirt pedals at the front of your chain will be the best place to put them when arranging your pedals on your pedalboard.
Quick Note: some dirt pedals, like vintage fuzz pedals, sound a lot better if they are the very first pedal in your chain (even before the tuner). That is because some pedals have buffers built into them, and that can change the impedance of your signal – which can change how a pedal reacts. If you hook up your board and realize your fuzz pedal sounds bad, try putting it at the very first of the chain!
3. Modulation
As mentioned above, your modulation pedal(s) could be something like a chorus or a tremolo. This will give your modulation pedals first dibs on your tone, which is generally what you want. You usually don’t want to feed a modulation pedal a heavily affected signal – unless you are trying to find a very, very strange guitar tone. Placing modulation pedals after your dirt pedals but before any time-based effects in your pedalboard arrangement is a great place to start.
4. Delay
The idea behind a delay pedal is to affect your entire guitar tone. Therefore, it should be placed near the end of the signal chain. This will allow the delay pedal to capture all of the tones coming from your awesome dirt and modulation pedals – turning them into a beautiful, echoing sea of repeats. Here is a list of the best delay pedals!
5. Reverb
The idea of reverb is very much the same as a delay. It is meant to capture all of your pedal board’s tones. After all, a reverb pedal helps simulate your tones as if you were playing in a large, open room. With this in mind, it should almost always be one of the final pedals in your signal chain. This helps capture all of the sounds from your dirt, modulation, and delay pedals and applies reverb to your whole sound – making everything sound cohesive. If you’re looking for a new reverb pedal, here’s our list of the best reverb pedals.
Where does a volume pedal go in the signal chain?
Typically, a volume pedal will be one of the first pedals in your signal chain. This will allow you to lower the volume of your guitar’s input running into your guitar pedals – just like how the volume knob on your guitar would work.
However, there are a few different places you can put a volume pedal – it just depends on how you’d like to use it.
For example, many people will also put their volume pedal in the middle of their pedalboard (between their overdrive/distortion/fuzz pedals and their modulation/delay/reverb pedals). Having the volume pedal here allows you to use the volume pedal without changing the sound of your overdrive/distortion/fuzz pedals (as these pedals react differently when the volume running into them changes… like if you roll off your volume knob to clean up your fuzz pedal) but still allows your delay and reverb sounds to trail off naturally. Lastly, some guitarists like having their volume pedal at the very end of their signal chain, allowing them to use the volume pedal as sort of a ‘master volume’ control for their entire sound.
Do some experimenting to see what is right for you!
If you’re looking for a volume pedal, here’s our list of the best volume pedals to choose from.
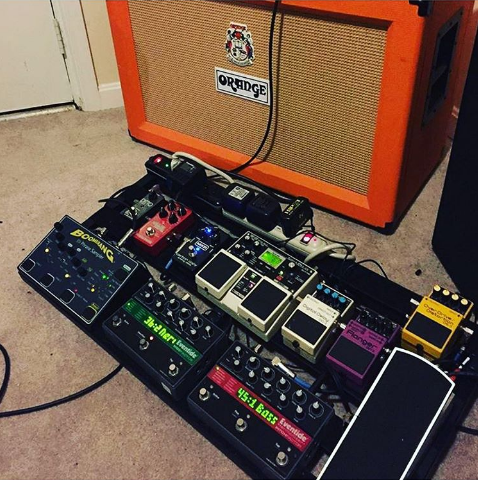
Photo courtesy of @jessebobb123
Powering Your Pedalboard
A great deal of today’s effect pedals can simply be powered by a 9v battery, but let’s face it, having a battery die on stage can be both embarrassing and frustrating. If you are invested in your pedalboard setup, we would recommend finding a way to power the board with a dedicated power supply – which removes the hassle of batteries.
Thankfully, we have put together a list of the best power supplies for pedalboards to help you make your decision. Ultimately, you will want to look for an “isolated” power supply, as they provide individual, isolated outputs for each pedal on your board – meaning if something goes wrong with one output, it is isolated from the others and won’t cause further issues.
If you are on an extreme budget, the cheapest option would be investing in a One Spot power adapter. This allows you to daisy chain your pedals together so that they are all working off of one power outlet. These adapters are a good solution to players with smaller pedalboards (no more than eight pedals), but as a pedalboard becomes more advanced, it is worthwhile to look into an isolated power supply unit.
An isolated power supply, such as Voodoo Lab’s Pedal Power unit, is a great, budget-friendly power supply choice for a diverse pedalboard.
Pedal Board Cabling
Now that you have your pedalboard layout planned and powered, it is time to hook it all together. Cabling your pedalboard can be quite a task. Retaining your layout and signal chain, while snaking your cables between your pedals, can leave you scratching your head at times.
The easiest way to go about this is picking up some pre-made patch cables because this will allow you to just plug everything together and get playing. There are a number of awesome patch cables out there, but the kind people over at TourGear Designs have given the Pedal Haven audience a discount code for their awesome flat patch cables. You can use the code: “pedalhaven” at checkout to save some cash on patch cables. Learn more about the TourGear Designs discount code.
Alternatively, you can pick up a pack or two of patch cables from places like Amazon too. We’d recommend these. They are fairly good quality and affordable:
 View on Amazon
If you know your way around a soldering iron and are a bit of a tinkerer, then we would recommend using a custom pedalboard cabling kit. This will allow you to cut the cables down to the exact length you need, minimizing wasted space and messy cable-covered boards. However, if your pedalboard layout is rather simple, picking up a few patch cables can do the job rather easily.
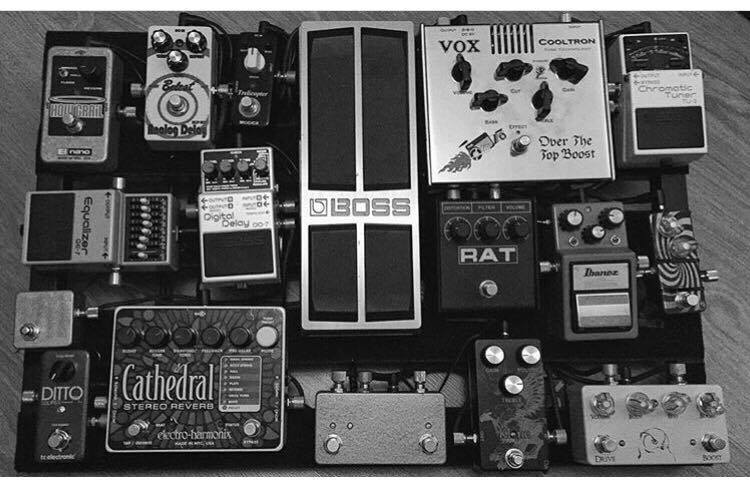
Photo courtesy of @ajhosker
Test It Out
You did it. You got your pedalboard put together. Now let’s just hope everything is hooked up correctly! Plug it in and test it out. Be sure to switch every pedal on and off to ensure they are properly working. If you don’t like the way it sounds, don’t be afraid to change up your signal chain and try out new things – after all, it is your pedalboard! Establish your tone and rock on forever.
If you just put together a pedalboard using this guide or have a pedalboard that you are proud of, submit it to our Instagram account! We would love to feature you!
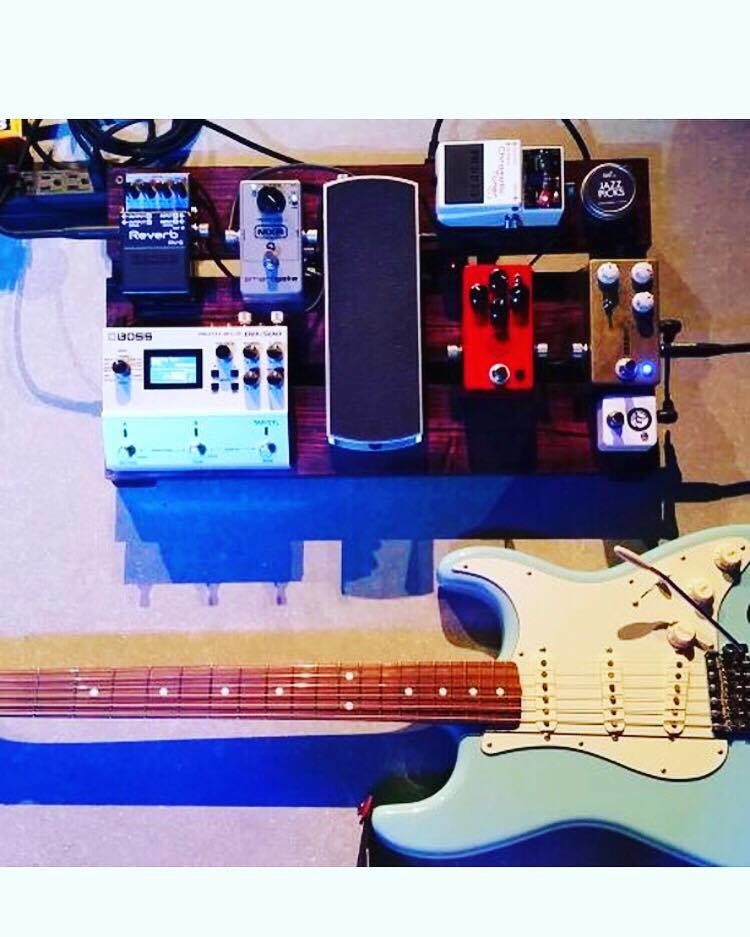
Featured Image Courtesy of @Kylethereptile